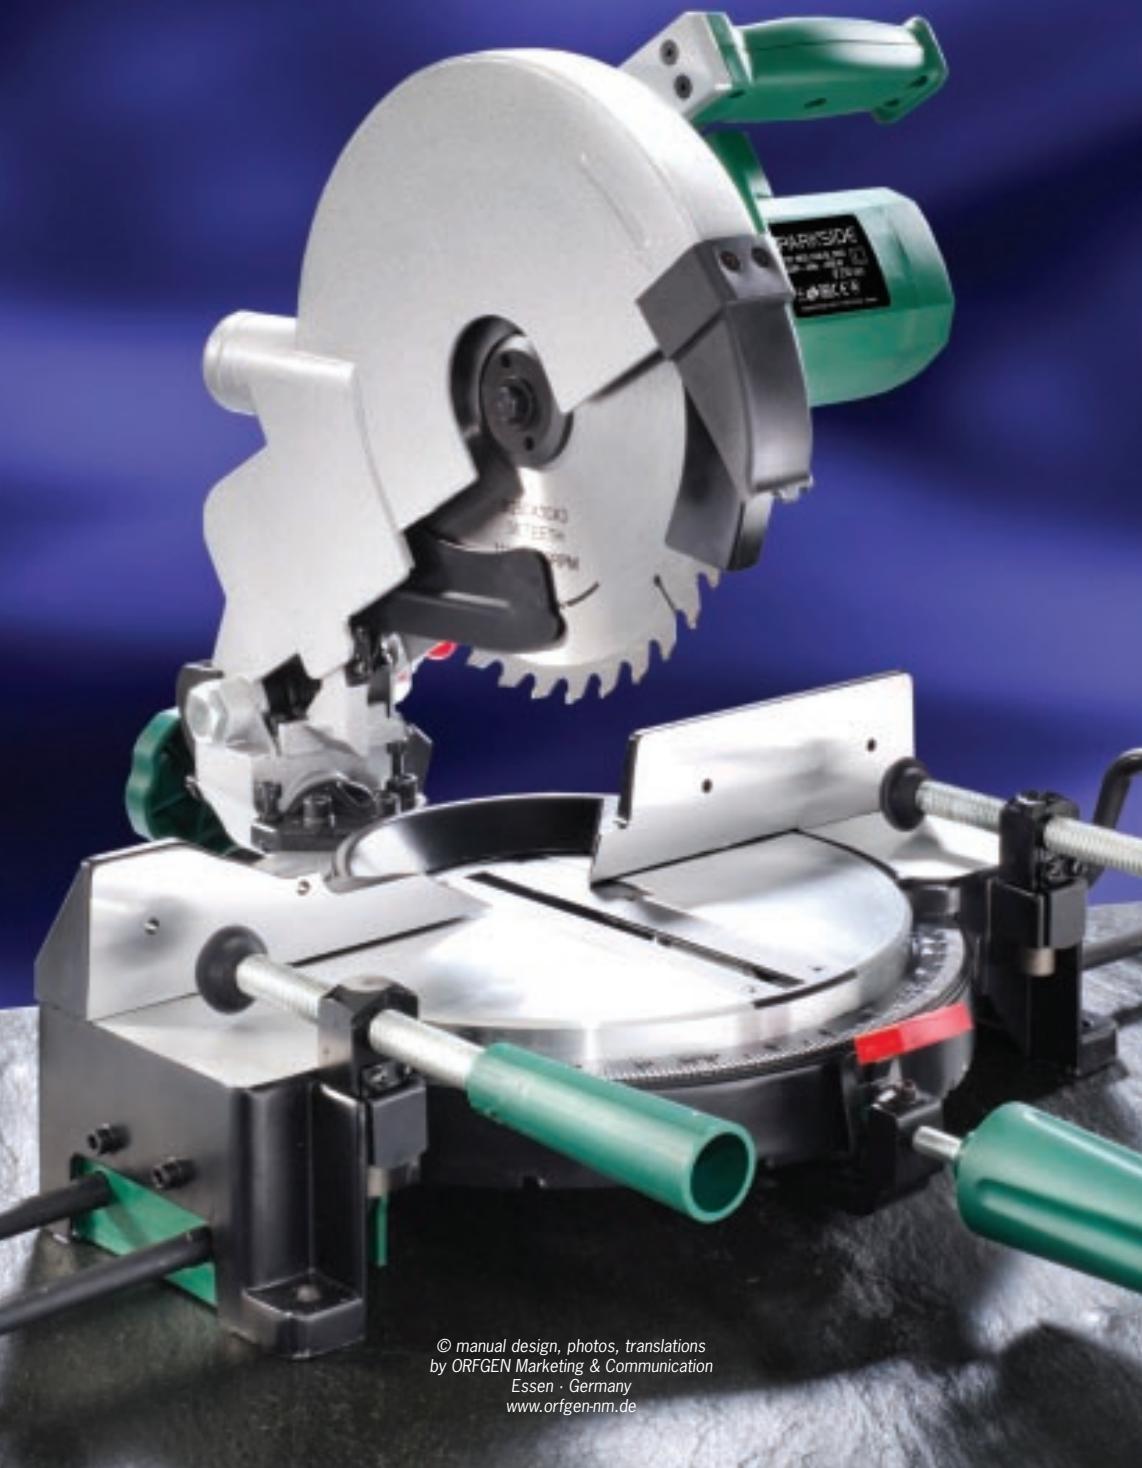
MODE D'EMPLOI PKGS 1400 CROSSCUT MITRE SAW PARKSIDE
PARKSIDE

PKGS 1400
Operating and safety instructions

GB
Operating instructions
Page
4-8

PARKSIDE
PARKSIDE
PKGS 1400 CROSScut MITRE SAW
For crosscut, mitre and compound sawing
Dear Customer! Please make sure you familiarise yourself fully with the way the equipment works before you use it for the first time and that you understand how to handle electrical power tools correctly. Please read the operating instructions below and the accompanying safety advice carefully. Use the equipment only as described and for the purposes indicated. By doing this you will be able to work in complete safety and produce better results. We hope you enjoy using your saw.
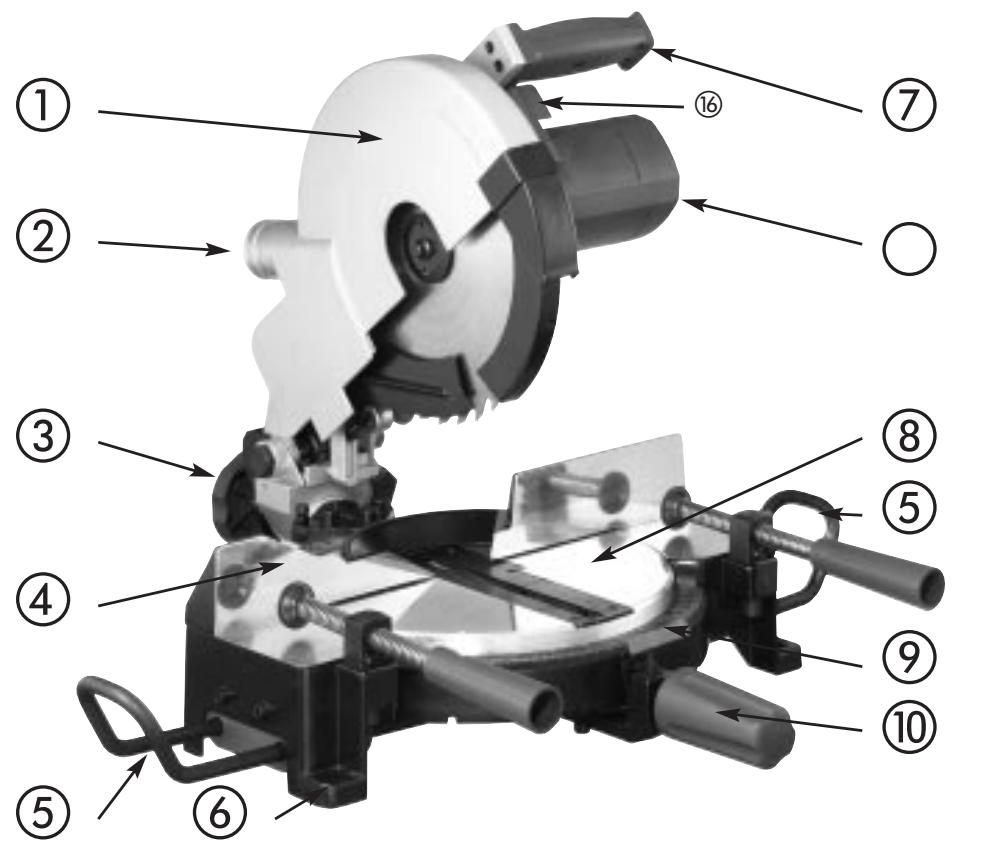
FEATURES OF THE PARKSIDE PKGS 1400
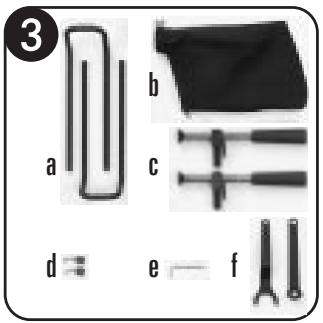
Motor List of accessories (Fig. 3)
① Cutting head (cast aluminium) (a) 2 transverse support stirrups (also ⑤)
② Dust extraction outlet (b) dust extraction bag
(3) Quick-set angle adjuster (c) 2 G clamps
④ Stop plate (cast aluminium) (d) 2 carbon brushes (see "Maintenance")
(5) Transverse support stirrup (e) Allen key
(6) Holding down bolt holes (f) Fastening and locking spanner
⑦ Actuating handle
Saw table (cast aluminium)
⑨ Control lever with setting indicator arrow
10 Stop setting handle
Nominal power: 1400 W Protection class: II
Nominal voltage: 230V 50Hz Sound pressure level: Lp = 95.5dB(A)
Nominal speed: n0 0 -3,800 / min Sound power level: Lw = 108.5 dB(A)
Weight: 14.5 kg Vibration: 2.5m / s2
IMPORTANT SAFETY ADVICE

To be read before you use the saw for the first time - in addition to the advice in the accompanying booklet on safety.
Every time before you use the saw:
- check the saw for any damaged parts and get them replaced at a specialist repair centre.
- check the condition of the saw. See that it is sharp, clean and free to move.
- check the blade to see that it is in good order and not loose. If required, tighten its fastenings with the spanner (f) supplied.
- check that any accessories used are suitable for the saw's maximum speed (see Technical information).
Always check that the saw runs correctly under no load first. If there are any unusual noises or vibrations switch the saw off immediately and pull the plug out of the mains socket. Never operate the saw when it has these types of problems. Get it checked out at a specialist repair centre and repaired if necessary.
Bolt down the crosscut and litre saw on to a steady surface using the holding down bolt holes ⑥ provided in the base.
Support long workpieces on a surface or blocks so that it is at the same height as the saw table. This will stop long workpieces from tipping over.
Always keep the power cable well out of the saw's working area and fed to the rear of the machine.
Look after your health: Wear ear defenders - also wear safety glasses and a breathing /dust mask.
After you have used the machine secure it with the locking button ⑧.
Only use saw blades that have a diameter of 250 mm and are suitable for the type of clamping flange on the saw. Saw blades with hardened metal teeth must have a negative rake angle.
Do not use saw blades that have deep hook teeth.
Do not use saw blades that have a recommended speed of less than 3800 revolutions per minute.
The head bolt on the spindle and retainer must always be kept clean.
Always check the workpiece carefully for any foreign bodies (nails etc.) and remove all dangerous items from area of the saw cut.
Never reach behind the blade. Only remove any material accumulated there once the saw has been unplugged and the blade has stopped rotating.
Do not cut too small a workpiece. Your hand must always remain at least 10 cm away from the saw blade.
Use G clamps (c) or other mountings to ensure that any (e.g. awkwardly shaped) workpiece cannot slide or rotate during cutting. The workpiece must be held tightly against the saw table base and stop plate so that there are no gaps between the workpiece and the saw table or the stop plate.
Make sure that all the clamps and stops are always tightly seated.
Never cut more than one workpiece at a time.
Make sure that the saw blade has reached its full speed before any cut is started and do not use too much force. This should avoid the saw being brought to a standstill.
ASSEMBLY

Only connect your crosscut and litre saw to the power supply when you have followed all these instructions and completely assembled the saw.
Pick up the saw using the transverse support stirrup ④ or the base plate and remove it from the packaging. Do not lift or carry the saw by the actuating handle ⑦ as this can lead to misalignment.
- Insert the transverse support stirrups ⑤ into the openings provided in the left and right hand sides of the base.
- Fully screw the stop setting handle for setting the stops on the saw table tightly into the threaded hole provided.
- Unscrew the stop setting handle 0 again two or three turns and rotate the saw table 8 using the control lever (pressing the control lever disengages the stop and allows the saw table to be turned to the left or right into the desired position) into the home position (0° - setting).
- When the control lever ⑨ is engaged in the home position, retighten the stop setting handle ⑩ to set the stop for the saw.
- Press the actuating handle ⑦ down gently and pull out the locking button ③ . The cutting head can be moved into the open upper position.
- Attach the dust extraction bag (b) to the dust extraction outlet ②. See that the dust bag sealing ring fits into the groove in the dust extraction outlet.
- So that you can work safely we recommend that you fasten down the crosscut and mitre saw on to a flat surface using the threaded holes provided in the underside of the saw base.
TESTING AND SETTING UP
Warning. Always switch off the power supply (pull out the plug) when you carry out adjustments or check the set-up of the machine.
1. Parallel blade
Check that the saw blade is correctly set up. It must be parallel to the saw notch on the table. To make any necessary adjustment, follow this procedure:
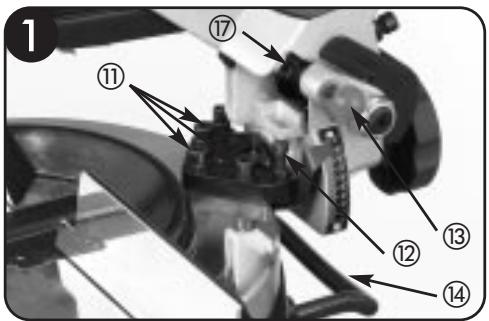
Move the saw table ⑧ into the home position (0° - setting). Bring down the cutting head ① and compare the alignment of the side face of the saw blade with the left-hand edge of the saw notch on the table. The blade and the edge must be absolutely parallel to one another. Changing the setting — if required, is done by loosening the three bolts directly behind the saw blade (see Fig ①/⑪) with the Allen key (e) and moving the cutting arm ① so that it is parallel. Then retighten the bolts.
2. Stop plate
Check the stop plate ④ particularly if it has been removed from the machine and replaced. The stop plate must be perpendicular (at 90° ) to the saw blade. Adjustment of the stop plate can only be carried out after the saw blade has been set parallel as above. We recommend that you use a set square to check the stop plate. Place one face of the set square against the stop plate and the other against the side face of the blade. If required, the adjustment is done as follows;
Unscrew the two bolts at the rear of the stop plate and set the stop plate ④ so that it is at 90° to the side face of the saw blade. Then retighten the bolts.
3. Saw blade depth
Check the saw blade depth with the cutting head ① lowered as far down as possible. The blade must always be able to be moved freely. Test that no teeth come into contact with any of the metal surfaces by turning the blade lightly by hand. If the blade does not turn freely, carry out the adjustment as follows:
Unscrew the lock nut (see Fig. 1/17) and turn the adjuster screw, until the blade runs freely. Then retighten the lock nut.
4a.Mitre setting 0°
If required you can adjust the 0° litre stop setting. Move the saw table ⑧ into the 90° home position ( 0° - setting) and with the cutting head ① lowered, compare the position of the side face of the saw blade with the table's support surface.
To adjust, unscrew the lock nut (see Fig. 1/2) and turn the screw until it touches the casting and the saw blade is at 90° to the saw table. Then retighten the lock nut. The saw blade must remain at right angles to the saw table and the scale reading on the cutting head remain at 0° .
4b.Mitre setting 45°
If required you can adjust the 45° litre stop setting. Move the saw table ⑧ into the 90° home position (0° - setting). Unscrew the quick-set angle adjuster ③ and tilt the cutting arm ① until it reaches the 45° setting on the scale. Retighten the quick-set angle adjuster ③ and lower the cutting head ①.
Use a combination angle gauge to compare the side face of the saw blade with the table's support surface. To adjust, unscrew the lock nut (see Fig. 2/8) and turn the screw until it touches the casting and the saw blade is at 45° to the saw table. Then retighten the lock nut.
5. Adjust scale
If necessary the scale pointer on the saw table ⑧ can be readjusted. Just unscrew the bolt, move the pointer to the new position and retighten the bolt. Each line on the scale represents 1° .
OPERATION

Take note of the mains voltage. The voltage must agree with that shown on the identification plate (equipment shown as 230V can also be used with 220V ).
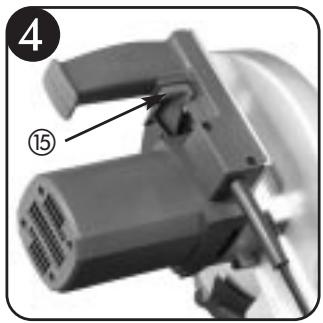
Press the switch ⑤ to start the machine, before sliding the safety lever (16) to the right and bringing down the cutting head ①. After completing the first cut release the switch ⑤ and wait until the saw blade has come to a halt before moving the cutting head into the open, raised position again.
Sometimes the spindle bolt can become loose due to the braking moment. This means you must check the spindle bolt frequently and retighten it when required.
SUPPORTING AND TRANSPORTING THE MACHINE
If you have not mounted the machine on a workbench, pull the rear support stirrup ④ out as far as it will go. This will ensure that the machine will not overturn if the cutting head springs back into the raised position.
The fully extended support stirrup ④ can also be used as a carrying handle for transporting the machine.
Always carry or lift the machine either by the base or by the extended support stirrup 14, and never by the actuating handle as this can lead to misalignment. When transporting the machine always secure the locking button 13 by engaging it when the cutting head is in the lowered position.
MITRE CUTS — ROTATING THE SAW TABLE
The PKGS 1400 allows you to make angled cuts (mitre cuts) from 0° ( 90° / straight cross cut) to 50° to the left or right. First release the stop setting handle by one or two turns. By pressing the control lever release the stop. Whilst pressing the control lever, turn the saw table to the left or right into the desired position and then release the control lever again. The PKGS 1400 has the most common settings 0° , 15° , 22.5° , 30° and 45° pre-set by the use of easily engaged fixed stops.
Before cutting make sure to secure the stop setting handle in order to lock the stop setting.
CROSS CUTS - TILTING THE CUTTING HEAD
The PKGS 1400 allows you to make cross cuts at angles of between 90° and 45° .
Release the quick-set angle adjuster ③ and with the help of an angle gauge set the angle for your cut. After you have set the angle and before you carry out the cut, be sure to retighten the quick-set angle adjuster ③ in order to lock the stop setting.
COMPOUND CUTS
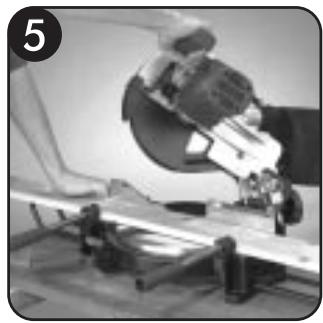
To carry out a compound cut you have to incline the cutting head ① and rotate the saw table (see the sections "Mitre cuts"
and "Cross cuts"). First select the tilt and rotation angles and then secure all the stop settings. Position yourself to the left of the saw blade (see Fig. 5).
We recommend in general that you always carry out a test cut. In this way you can satisfy yourself that the angle is right and the material can be cut correctly.
MAINTENANCE OF THE CROSScut AND MITRE SAW
Before starting any work on the saw always pull the plug from the socket.
- The replacement carbon brushes (d) supplied may only be changed and fitted at an authorised repair centre.
- Clean the crosscut and mitre saw frequently. For the best results do this straight after the work has been completed.
- Do not allow liquids to get inside the saw. Use a soft cloth for cleaning the housing. Do not use petrol, solvents or cleaners that might attack the plastic.
TIPS AND TRICKS
- If you often wish to use the saw in a lot of different places we recommend that you mount it on a 20mm thick plywood base. You can carry the saw easily on this and attach it to many kinds of surfaces.
- Never position curved workpieces in such a way that they curve away from the stop plate. This creates a gap between the stop plate and the workpiece, which could lead to the workpiece jamming during the cut.
- Cut a curved workpiece initially a little longer / larger than necessary and only after this should you cut it to the exact length required. A large curve is always detrimental to accuracy.
To improve safety, mount an additional wooden guide (75× 500× 12mm) on the saw. There are some suitable holes provided on the stop plate for this.
Further practical tips for power tools can be found in the accompanying booklet on safety advice.
We reserve the right to make technical modifications in the course of further development.
We, Kompernaß Handelsgesellschaft mbH, Burgstr. 21, D-44867 Bochum, Germany, hereby declare that this product conforms with the following EC regulations:
EC low voltage regulations:
Electromagnetic compatibility:
Applicable harmonised standards:
73/23 EEC, 93/68 EEC
89/336 EEC
EN 55014-1: 1993 + A1 + A2, EN 61000-3-2: 1995 + A1 + A2,
EN 60555-3:1987, EN 60555-3/A1:1991, EN 55014-2:1997
EN 61029-1: 1995, prEN 61029-2-9: 1994
Type:
PKGS 1400
Bochum, 30.07.2002
Hans Kompemaß
WARRANTY
This piece of equipment is covered by a 36-month warranty as of the date of purchase. The equipment was produced with the greatest of care and underwent thorough testing before delivery. In the unlikely event of detecting a functional defect, please return the equipment in its original packaging with the proof of purchase (if available) to the closest service address.
Damage caused due to improper handling as well as regular wear of the parts are not covered by this warranty.
Beaver Electronic Services · The Lodge, Premier Business Park
Long Street, Walsall · West Midlands, WS2 9DY
Tel.: 01922/725554 Fax: 01922/725417
WARRANTY
This piece of equipment is covered by a 36-month warranty as of the date of purchase. The equipment was produced with the greatest of care and underwent thorough testing before delivery. In the unlikely event of detecting a functional defect, please return the equipment in its original packaging with the proof of purchase (if available) to the closest service address.
Damage caused due to improper handling as well as regular wear of the parts are not covered by this warranty.
Irish Web Specialists
1 Verbena Avenue · Dublin 13
Tel.: 01/8320492 Fax: 01/8396829
PARKSIDE